How I Built a Raised Bed Garden for Under $50
How I Built a Raised Bed Garden for Under $50
Is it really possible to build a raised bed garden for under $50? Many believe it’s a lofty goal, but with the right approach, you can create a productive garden without breaking the bank. By carefully selecting materials and using some ingenuity, you’ll find that a thriving garden is within reach. Let’s explore the steps and choices that can make this project both affordable and successful.
Key Takeaways
- Use recycled pallets for a cost-effective and durable raised bed frame, adding rustic charm to your garden.
- Source budget-friendly topsoil and compost from local stores or community swaps to enrich your soil.
- Gather essential tools like a hand saw, tape measure, and garden trowel for efficient construction and planting.
- Choose a sunny, level area for your raised bed to maximize plant growth and ensure good drainage.
- Regularly check soil moisture and apply organic fertilizers to maintain healthy plants and optimize your garden’s yield.
Choosing the Right Location for Your Raised Bed Garden
When choosing the right location for your raised bed garden, what factors should you consider to ensure success?
First, look for a spot that gets at least six hours of direct sunlight daily; most vegetables thrive in sunlight.
Next, ensure proper drainage by avoiding low areas that collect water.
Additionally, consider accessibility—place your garden near a water source and within easy reach for maintenance.
Lastly, think about wind exposure; a sheltered spot can protect fragile plants. It’s also beneficial to create an effective DIY gardening solution that complements the chosen location.
Selecting Affordable Materials
When you’re building your raised bed garden, selecting affordable materials is key to staying within budget.
Consider using recycled pallets for the frame, which can save you a significant amount of money.
Additionally, look for budget-friendly soil options and affordable planting supplies to ensure your garden thrives without breaking the bank. To enhance your garden’s success, consider using organic compost as a nutrient-rich amendment to improve soil quality.
Recycled Pallets for Savings
Have you considered using recycled pallets to create your raised bed garden? They’re not only budget-friendly but also eco-friendly!
By repurposing pallets, you can save money while giving your garden a rustic charm.
Here are a few benefits of using pallets:
- Cost-Effective: Often available for free or at a low cost.
- Durable: Made to withstand heavy loads, they can last several seasons.
- Customizable: You can easily cut them to fit your desired dimensions.
With a little creativity, you’ll transform these pallets into a beautiful, functional space for your plants without breaking the bank!
Budget-Friendly Soil Options
After setting up your raised bed with recycled pallets, the next step is to select the right soil to ensure your plants thrive.
Start by looking for affordable options like bagged topsoil or garden soil from local stores; they often have sales.
You can also mix in compost from your kitchen scraps or yard waste, which enriches the soil without breaking the bank.
If you have access to a nearby farm or garden center, consider asking for leftover soil or mulch.
Lastly, check community groups for soil swaps—this way, you can get quality materials at little to no cost.
Affordable Planting Supplies
Equipping your raised bed garden with the right planting supplies doesn’t have to drain your wallet.
Here are some budget-friendly options that’ll keep your garden thriving without spending a fortune:
- Seed packets: Buy in bulk or choose local varieties for better prices.
- Compost bins: Create your own compost from kitchen scraps to enrich your soil.
- Basic tools: Look for second-hand gardening tools at thrift stores or garage sales.
Tools You’ll Need for the Build
Before you start building your raised bed garden, it’s crucial to gather the right tools.
You’ll need essential hand tools, some power tools for efficiency, and proper safety gear to protect yourself during the project.
Let’s break down each category to ensure you’re fully equipped for a successful build. Additionally, consider incorporating plant selections that are suitable for your balcony garden to enhance your space’s aesthetic and functionality.
Essential Hand Tools
When building a raised bed garden, having the right hand tools on hand makes the process smoother and more efficient. Here are three essential tools you’ll need:
- Tape Measure: To ensure accurate measurements for your bed dimensions.
- Hand Saw: For cutting wood to size, especially if you’re using reclaimed materials.
- Garden Trowel: Perfect for digging, planting, and mixing soil.
With these tools, you’ll be well-equipped to construct your raised bed.
Each tool plays a significant role in achieving the desired results while keeping the project enjoyable.
Power Tools Needed
Power tools can significantly enhance the efficiency and precision of your raised bed garden project.
First, a power drill is essential for quickly driving screws and making holes in your wood. Next, a circular saw allows you to cut lumber to the exact dimensions needed for your beds. If you’re working with tougher materials, a jigsaw can help with intricate cuts. Additionally, a sander will smooth rough edges, ensuring safety and aesthetics. Finally, a level is crucial for ensuring your raised beds are even, preventing water pooling.
With these tools, you’ll streamline your build and achieve the best results effortlessly.
Safety Gear Required
To ensure your safety while building a raised bed garden, you’ll need to equip yourself with the right safety gear.
This will help protect you from potential injuries and make the process smoother.
Here’s what you should consider:
- Safety goggles: Protect your eyes from dust and debris while cutting or drilling.
- Work gloves: Keep your hands safe from splinters and sharp edges when handling materials.
- Dust mask: Avoid inhaling harmful dust particles, especially when working with treated wood or power tools.
Having this gear on hand will help you focus on creating your garden without worrying about safety hazards.
Step-by-Step Construction Process
Constructing a raised bed garden is an exciting project that can enhance your outdoor space and improve your gardening experience. Follow these steps to build your bed.
| Step | Description |
|---|---|
| Choose Location | Select a sunny, level area |
| Gather Materials | Use untreated wood, screws, and tools |
| Assemble Frame | Cut wood to size and secure corners |
After assembling the frame, ensure it’s stable and level. Remember to consider maximizing space for your plants, as this can lead to a more productive garden. You’ll be ready for the next stage—filling your raised bed with soil—once the construction is complete. Happy gardening!
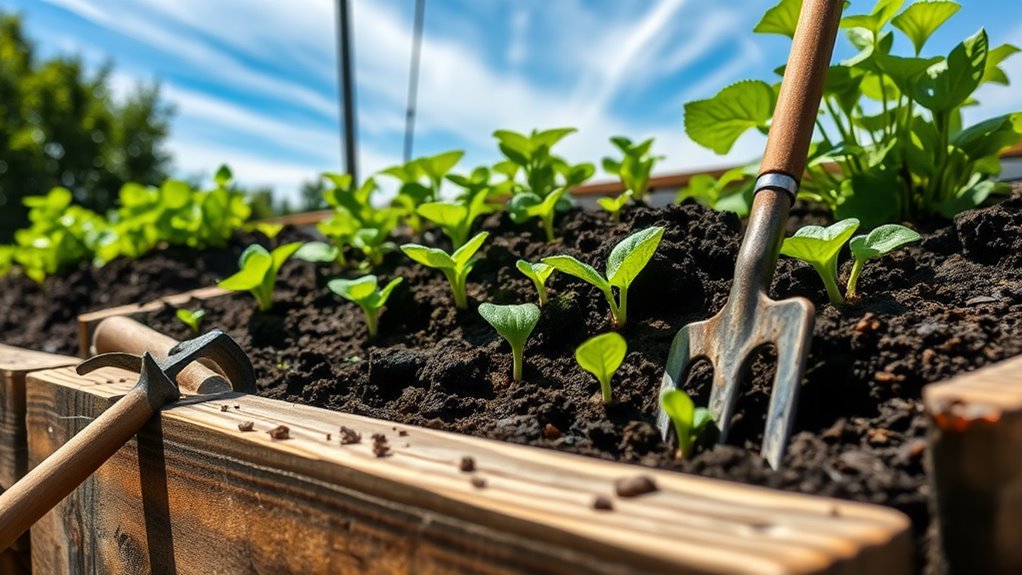
Filling Your Raised Bed With Soil
Once your raised bed frame is securely assembled and level, it’s time to fill it with soil.
The right soil mix ensures healthy plant growth.
Consider using:
- Topsoil: Provides the foundation for your plants.
- Compost: Enriches the soil with nutrients and improves drainage.
- Coconut coir or peat moss: Helps retain moisture and aerate the soil.
Mix these components in equal parts for a balanced blend. Additionally, consider conducting a soil test to better understand the nutrient profile and pH levels of your soil mix.
As you fill your raised bed, leave a couple of inches at the top to prevent overflow during watering.
Finally, lightly tamp down the soil to eliminate air pockets and create a stable base for your plants.
Planting Your First Seeds or Seedlings
As you prepare to plant your first seeds or seedlings, it’s essential to consider the timing and method for optimal growth.
Choose seeds suited for your climate and planting season; consult a planting calendar for guidance.
If you’re using seedlings, ensure they’re healthy and acclimatized to outdoor conditions.
Create small holes in the soil, following the recommended depth for each plant.
Space your seeds or seedlings according to their growth requirements.
Gently cover them with soil, patting it down lightly.
Water them thoroughly, ensuring the soil is moist but not waterlogged.
Watch for germination and enjoy your gardening journey! Additionally, keep in mind that following essential planting calendar tips can enhance your gardening success.
Maintenance Tips for a Thriving Garden
After planting your seeds or seedlings, maintaining your garden becomes vital to ensure healthy growth and abundant yields.
Here are three essential maintenance tips:
- Water Consistently: Check soil moisture regularly and water deeply, especially during dry spells.
- Weed Regularly: Keep weeds at bay by pulling them out early to reduce competition for nutrients.
- Fertilize Wisely: Use organic fertilizers to nourish your plants, following the recommended application rates.