How I Made a DIY Drip Irrigation System for $5
How I Made a DIY Drip Irrigation System for $5
You want to save water, you want to promote healthy growth, and you want an efficient way to water your garden. A DIY drip irrigation system can help you achieve all of this without breaking the bank. In just a few simple steps, you can create a functional setup for only $5. Curious about the materials and assembly process? Let’s explore how you can transform your gardening experience with this budget-friendly solution.
Key Takeaways
- Used a garden hose as the main water supply line, minimizing costs while ensuring adequate water delivery.
- Cut inexpensive drip tubing to desired lengths for efficient plant coverage using sharp scissors.
- Secured emitters in the tubing to regulate water flow directly to plant roots without overspending.
- Connected the system to the water source and tested for leaks or clogs using a simple observation method.
- Regularly maintained the system by checking for clogs and leaks, ensuring it operated effectively without additional costs.
Materials Needed for the Drip Irrigation System
To set up an efficient drip irrigation system, you’ll need a handful of essential materials. Start with a main water supply line, which can be a garden hose or PVC pipe. Next, grab drip tubing, which delivers water directly to your plants. Don’t forget connectors and stakes to secure the tubing in place. You’ll also want emitters, which regulate water flow. Consider a filter to keep debris out, and a pressure regulator for consistency. Incorporating a pressure regulator can help ensure that your plants receive a steady and appropriate amount of water.
With these materials, you’re well on your way to creating a DIY garden irrigation system that saves water and keeps your plants thriving. Happy gardening!
Tools Required for Assembly
Assembling your DIY drip irrigation system requires a few handy tools to make the process smooth and efficient.
You’ll need a pair of sharp scissors or a utility knife to cut your tubing accurately.
A measuring tape ensures you get the right lengths for your garden layout.
A small drill with a drill bit is essential for creating holes for your drip emitters.
Don’t forget a ruler for precise measurements and a marker to mark your tubing.
Lastly, a pair of pliers can help secure connections.
Additionally, using a water-saving tool like a drip irrigation system can significantly reduce water waste in your garden.
With these tools on hand, you’re ready to dive into your irrigation project!
Step-by-Step Assembly Process
Starting your drip irrigation system is straightforward when you follow these essential steps.
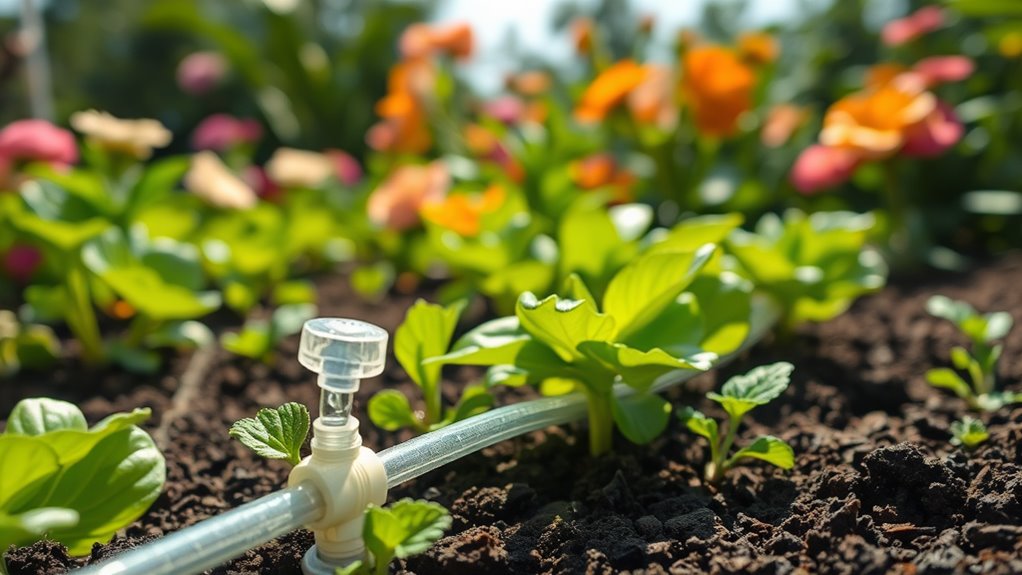
First, gather all your materials, including tubing and connectors. Next, cut the tubing to your desired lengths, ensuring it reaches all your plants. Attach the connectors, making sure they fit snugly. Then, position the tubing on the soil, placing emitters near the roots of each plant. Secure the tubing with stakes if needed. Finally, connect the main line to your water source.
Incorporating self-watering pots can enhance your setup by ensuring your plants receive consistent moisture even when you’re not around.
With everything in place, you’re ready to set up your system and let it work its magic, providing your plants with consistent hydration.
Testing the System for Efficiency
How can you ensure your drip irrigation system is working efficiently?
Start by turning on the system and observing the water flow. Check each emitter or drip line for clogs or uneven distribution. You want every plant to receive a consistent amount of water.
Use a soil moisture meter to monitor moisture levels; this helps you identify areas that might need adjustments. Implementing efficient watering techniques can significantly enhance your system’s effectiveness and plant health.
After testing, consider running the system for a few hours, then evaluate if any areas are over or under-watered. Adjust the emitters as necessary to optimize performance and ensure your plants thrive with the right hydration.
Tips for Maintaining Your Drip Irrigation System
Maintaining your drip irrigation system is essential for ensuring it operates efficiently and effectively.
Start by checking for clogs in the emitters and filter regularly; clean them as needed. Inspect hoses for leaks or cracks, and replace any damaged sections promptly. Adjust the system seasonally; during hotter months, you might need to increase watering frequency.
Don’t forget to flush the system at least once a year to remove any built-up sediment. Additionally, consider the correct amount of water your plants require based on their specific needs to avoid common watering mistakes.
Lastly, keep an eye on your plants—if they’re wilting or showing signs of overwatering, it might be time to tweak your setup. A little maintenance goes a long way!